Pages

Wednesday, February 9, 2011

For The Love Of Cocoa!

Let's talk some hilarity to put a chuckle in your day.  I, admittedly, have been unfortunately blessed with such foul luck (at times) that it leads to some pretty decent stories to recount.

After driving home in a blizzard to spend time with my Dad, I rushed back home (to avoid any more ridiculous weather and, quite frankly, to be warm because their house is flipping cold).  I scrambled to get a whole bunch of stuff together for baking as well as to make sure I could eat for the next week then went to hole up from the cold.

I was so terribly excited to get baking flourless brownies, thinking that I had cocoa in my pantry; I could even smell the chocolate in the air and nearly tripped on the drool on the floor(okay, that last one was a complete lie, sorry).  So, you can imagine how hard my heart hit the floor (and then some) when I discovered that I actually had not pillaged the cocoa from the pantry.  Yes, that definitely hurt.  I stood like Marvin from Hitchhiker's Guide in my kitchen and wallowed for a few moments.

Gotta turn this baking need into some baked goods, I thought.

I had the will, and, since the cliché is totally true, there had to be a way!

My default?  Cookies!  I didn't have a lot of time after all of that wallowing, so I made oatmeal from the Quaker mix (just the plain version).  Personally, I really like this mix.  I like this mix plain, with chocolate chips, with raisins.  Oh, yes, I'm quite a fan.  I definitely like it, Sam I Am.  Seuss jokes aside, they are especially wicked-awesome if you have chocolate orange on hand from your Christmas holidays (I get a bunch from my family; it's a dangerously delicious tradition).

In this particular case, I decided to add in some white chocolate chips and dried cranberries.  Ultimately, I used half of the bag of mix, a quarter cup of white chocolate chips and a third a cup of dried cranberries (which I chopped down into smaller pieces).

I also fashioned myself some lime cheesecake jello.  Have you guys ever tried it out?  I like it because I like that milky taste but, obviously, I can't walk around eating cheesecake a day.  I'm not one of those lucky people with a ridiculous metabolism.  There's nothing wrong with that at all; I'm a little green around the edges, you lucky people!  This recipe is nice because its not too heavy, not too sweet and still has a nice flavour.  I happen to enjoy this but I find that taste is fairly subjective so this may not appeal to everyone (forewarned is forearmed!).

I like the lime version because I'm partial to lime (though I hate the colour green).  This recipe for me makes about twelve small servings in individual cups for which I had lids.  I have, however, also made this like a real pie with a graham cracker crust.  For right now, I'll go over the actual filling part, but there's no reason you can't make a pie with your favourite graham cracker crust (homemade or otherwise).  It will totally have to hangout in the fridge for a long time to get that solidification so that it isn't like soup but actual cheesecake.

All that said, on with the recipe (and the bad photo!).


Lime Light Cheesecake

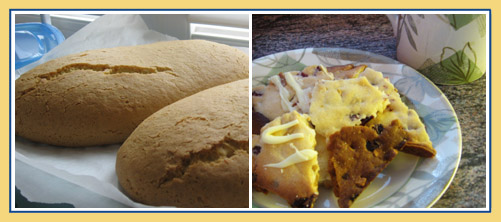
After I took this picture, I thought about having a tea party in my living room.  Spreading out the picnic blanket and sitting quite like Alice in Wonderland, sipping tea and enjoying tiny sweets.  On the left, I have a little cup of the lime cheesecake and a couple of the oatmeal cookies that I baked (right)!  Now for a miniature tea set... 


What You'll Need:

  • 2/3 cup water, boiling
  • 1 (85g) box of Lime-flavoured Jell-O (I use the regular one, but there's no reason you can't use the sugar-free one!)
  • 1 cup Non-Fat Cottage Cheese
  • 1 (250g) container of Fat-Free Cream Cheese (I used Philadelphia 95% Fat Free Cream Cheese; the container is this light blue colour which is different from the 'light' one whose package is white.)
  • 2 cups Light Cool Whip, thawed (Just let it hang out in the fridge for a bit then you can freeze the bit you don't use.)
  • 3 limes, zested and juiced (I say three because I really like that lime taste.  If you're not a citrus fan - happens to some people - you can definitely scale this back)


How It's Done:

  1. In a large bowl, add cottage cheese and press large lumps with a spatula as best as you can.  (This is because I don't own a food processor.  If you do, lucky you, and you can just wazz up the cottage cheese until its smooth and then carry on.)
  2. Add in softened cream cheese and beat with an electric mixer until smooth and light.  (Again, food processor makes this a walk in the park.)
  3. Mix in the lime zest and juice.  (I mix the lime zest in first then the juice.)
  4. Stir boiling water into the Jell-O and stir for 2 minutes.
  5. Cool 5 minutes.  (This is important because I've not waited before and it get s a little clumpy.  You can fix that by continuing to mix it with the electric beater.)
  6. Slowly incorporate the lime Jell-O into the cheese mixture until incorporated.
  7. Add the whipped topping and mix everything together until it is homogeneous; make sure at this point to scrape down the sides.
  8. Pour the filling into the individual cups and refrigerate for 4 hours to fully set.  (If you're using a pie crust, you're going to want to pour the filling in slowly.  I used a shallow dish when I made the crust and ended up having a little extra.  That's how I got the idea to make the individual cups - I poured the extra into a few ramekins and covered with saran wrap until I wanted to eat them up.)

Makes 12 servings (or six really generous slices of pie, ftw!).


There are a ton of recipes for this on the internet, including numerous different variations.  The closest one to the mischief I got up to would be from Cooks.com (click here!).  I don’t see why you couldn’t do lemon like that version suggests.  I’m thinking I might try raspberries and stir in some raspberry preserves or something.

Saturday, February 5, 2011

The Weather Outside Was Frightful

There was a storm looming in the future sky as I sat at the bench on Tuesday.  The weather forecast was telling me there was going to be a ton of snow, enough to build ample snow people outside of my house.  Perhaps work would be cancelled as well.   Hold the phone, they so hardly close the facilities so why on earth should I even bother to feel some fear here?

Boy, did I really have to eat my words when, on Wednesday morning, I wake up and find a notification to tell me that only essential workers are required to report.  Of course, I wasn't complaining.  Who wants to dig their car out of the snow to go to work anyway?  No, I stayed inside and (gleefully) watched the white fluffy stuff just keep coming.

And you know, things were really fun for the first hour or so.  Then I realized how boring sitting around is!  Okay, yes, this sounds silly but, when you spend your day running around with a million things to do, you don't frequently have a lot of time to sit around to ponder your existence.

Ugh, pondering existence, I thought.  Major pass.

So, I baked cookies.  I have no idea how bizarre it actually looked, but I'm sure my neighbors thought it was odd to see someone baking cookies really early in the morning!  Regardless, the snickerdoodles came out crispy this time.  I'm also happy to report that I have plenty of chai-spiced sugar to put to devious use elsewhere.

I hope that the weather has been treating all of you guys okay!  There was a delay on this post largely because my million-and-one things got pushed back a day.  No worries, though, the train's back on the track.

I'm hoping to have something new soon.  In the meantime, I'll post another picture of those snickerdoodles...

The snow was piling up outside and, given the cold, it was already hard enough to go outside without it.  Conclusion? Stay inside, bake cookies, eat cookies and read.  Good plan?  Yes.  Productive?  Well...

Saturday, January 29, 2011

Baking By Beseechment

When blueberries go on sale, people get excited.  And, when said people get excited, they buy blueberries.  I, myself, shared in the joy, however, I was not overly ecstatic about blueberries.  I buy them sparingly at a time lest I be forced to eat oodles of berries for days to make sure that they don't go funny in the fridge.  Perhaps most disappointing of all is having the bad luck to pick a bad (or old) batch of berries quite by mistake.

After this happens, what is one to do with the blueberries?  There isn't anything wrong with them, but they aren't exactly tasty either... The solution?  Well, you could make syrup for ice cream; I, sadly, have no French Vanilla ice cream.  I could make pancakes but, man, I am *way* too lazy to put that much effort into breakfast.  Pie?  Not enough blueberries.  Cookies?  Weird (though intriguing...).  Nope, at long last, the decision was made.  Muffins.

So, gifted with someone else's unluckily picked 6 oz of blueberries, it was off to the kitchen!

I scowered the internet for a recipe that I thought I could put myself behind, something solid that would carry less-than-stellar berries.  After about 20 minutes, I still was left a litte bereft.  So, the story is that I sort of squished a few together into one amalgam (not of the mercury kind) and headed off to the kitchen.

Gifting my blueberry gifter in return with these muffins, I was a little nervous because they weren't super sweet.  However, I was told that they were pretty yummy none-the-less.  A tad lackluster in my honest opinion, but maybe worth a try anyway?

Sorry in advance.  I hope to have a more successful undertaking report in due time!


"I Beseech You" Blueberry Muffins

If I were a muffin and I had just come out of the oven in a new silicon baking cup, I think I'd want to look as nom-worthy as one of these.  Just saying!


What You'll Need:

  • 5 tablespoons margarine (It comes soft but, if you use butter, make sure that it is softened.)
  • 1/2 cup sugar
  • 1 large egg
  • 2 containers (100g ea.) of Vanilla Activia yogurt (The original recipe says 3/4 of a cup of yogurt or sour cream.  How is that for freedom of choice?)
  • 1/4 tsp pure vanilla extract
  • 1/4 tsp ground Coriander seed (The container I had said 'slight lemon flavor' and I figured it would be a way to get that suggestion of flavor without offending those opposed to citrus.)
  • 1/2 cup all-purpose flour (Sift away, my friend!)
  • 1 cup whole wheat all-purpose flour (I sifted it to take out the larger clumps.)
  • 1 1/2 tsp baking powder
  • 1/4 tsp baking soda
  • 1/4 tsp salt  (I used kosher salt, of which I have become quite a fan lately for sure.)
  • 6 oz. package of blueberries (Gifted and to be returned in an entirely new form!)


How It's Done:

  1. Preheat the oven to 375F.
  2. Line a baking sheet with the cups or butter/flour the pan or spray with non-stick stuff.  (OR - yes, there's more - you can use the silicon baking cups that you got in your Christmas stocking.  Thanks mo-- I mean, Santa!)
  3. Whisk together your dry crew (Coriander, the flours two, baking powder, baking soda, kosher salt) and set aside until you need it.
  4. Armed with electric mixer, beat the margarine and sugar until its died and become lighter in color and consistency.
  5. Toss in the egg carefully and mix.
  6. Mix in the yogurt and extract as well.  (I used a rubber spatula to usher the yogurt from the bowl I had dumped it in to the mixing bowl.)
  7. Mix in half of the dry ingredients over batter and mix until combined.
  8. Add the rest of the dry ingredients and mix until you don't see streaking from the flour anymore.  (My dough was pretty gosh-darn thick but apparently this is okay.  Honestly, they still turned out okay!)
  9. Fold in the blueberries.  (I was pretty good with the not-squishing the berries this time around, but I've done it in the past and cried a little bit.)
  10. Use a pretty hefty spoon to dish out even amounts of the batter into your prepared muffin baking apparatus set-up of choice. 
  11. Toss them in the oven and bake for 25 minutes, waiting until the tops look golden and nice.  (Okies, so I tossed them in and watched them sparingly for a while.  When they were golden, I chopstick-tested one - no toothpicks - to see if they were done.  I pulled them out, waited for them to cool and then pulled them out of the pan to cool on a rack.)
  12. Eat at your leisure or store in a container to share later!


Makes 12 mild-tasting muffins to enjoy with 12 awesome cups of coffee.


Like I said before, I ran through a boatload of  recipes and sort of wasn't sure quite what to do.  I liked the whole wheat idea, but wasn't willing to fully commit.  I like using yogurt instead of oils.  I... I wasn't really going to go down the lemon road because, oddly enough, there exist people who just don't like citris (not judging of course).  So, this recipe probably most closely resembles one that I found on Kate's blog called Cookie+Kate (check it out!).  Mind you, the reference does not stop there!  She found it on Smitten Kitchen (linkage!) where it came from Cook's Illustrated.  Yeah.  How's that for a chain-letter of linking to reference?  Thumbs up!

Friday, January 28, 2011

Ovens: Not Just For Baking Sweets

Oh my goodness!  I do declare that it has been nearly a month since we have spoken.  What, dare you ask, have I been so terribly busy with that I haven't been able to get in touch with you guys?  Well, lots of stuff.  Mostly school.  Such a simple answer and, yet, still such a long time.  I think I owe you guys a post and what better way to come back from the abyss than bearing gifts?

So, all things considered, this should probably be about baking.  I mean, it stands to reason that I love baking and, in trying to win your affections, I would bake.  Come to think of it, maybe I should have baked?  Well, long story short, folks, the oven is good for things other than baking sweets.  To prove this (to myself probably the most), we're going to talk about snacks. 

I fired up, or rather set the dial, to a lovely, toasty warm 350F (that's about 178-ish degrees Celsius OR 451.15 K for you science enthusiasts) and cooked me some kale chips.  Let me just say that this is the first time that kale and I have dated.  I originally purchased the kale to make soup (which turned out quite well), however, only so much kale actually fits in the CP.  Or, so I subsequently discovered.  I was, therefore, left with a lot of kale and, not wanting it to get gross and limp in the fridge, I decided to try this kale chip business on for size.  In truth, I had been thinking about doing this for quite some time.  After trying it out, I do say, it fits me quite well I do say! 

First batch I used Herb & Lemon seasoning from Club House.  They were tasty!  Second batch I used kosher salt and they were tasty too.  I, however, like my salt reserved for other things.  Like raw fish over rice.  Anyway, kale gets points with me for being leafy and green.  Aside from that, the interweb also says that they have a wealth of vitamins that I can chow down on.  The real story here is they are crunchy, tasty and better for me than chips.  At least, because they're green, I don't feel as guilty eating them.

I next cranked the oven to 400F (204.44 degrees Celsius or 477.15K) and made up some chickpeas.  I had picked up a huge can for a dollar and wanted to try something other than hummus.  Not that there is anything wrong with hummus.  With celery.  Need I say more?

Armed with a bounty of kale chips and chickpeas, I settled myself in on the couch and watched Beauty and the Beast.  And it was good.

If you want to make your own kale chips and roasted chickpeas, check out these instructional videos (kale! and chickpeas! oh my!) from Dani Spies.  She's a clear-speaking, friendly lady with some "d'lishes" ideas to get your movie night started!


What more could you want for some movie-watching?  Kale chips (left) and roasted chickpeas (right) make for some beautiful and beastly munching!

Saturday, January 1, 2011

Mixed Makings Make Muffins

You know what the best thing about turkey dinner is?  Left-overs.  I'm sure you've probably read countless blogs about how to use various pieces of the dinner as left-overs (Turkey crispy bits as a salad topper?  Thank goodness we have Jamie Oliver hanging around, eh?)  No doubt you've gotten some great ideas, but I don't have a "left-overs" story for meat for you, or for any of the vegetable dishes.  Admittedly, I'm not even remotely half the chef that my mum or aunt are.  However, they've had more practice than me.

Anyway, one of our family holiday traditions is to visit with my family for Christmas day.  For us, this means traveling a great distance to my aunt's house to enjoy the holidays to the full extent in the only way we know how; through the sharing of awesome eats, tasty alcoholic beverages and assorted desserts.  The last few years, I have baked a cake to take along but, this year, I totally slacked off!  My mother, however, prepared an epic fruit plate of epic-ness.  It had cantaloupe, grapes (red and green), strawberries, blackberries and blueberries. 

Even afterward, we still had left-overs of the various fruits.  I think we still even have a cantaloupe kicking it in the bag in our fridge.  The berries, however, were staring me straight in the face, day after day. 

"Eat me!" They cried desperately from their little plastic prisons. 

"But I want an apple!" I replied in return, reaching for the fruit drawer instead. 

"Bah, you are no use to us!"

Oh, but I am, you see, because I know of this thing called the internet and how to use it to find recipes.  So I used this massive well of information to find me a muffin recipe.  I don't usually make muffins, but I couldn't think of a better way to use assorted berries.  So, I found a recipe for fruit and jam muffins on Joy's blog after a little bit of searching.  (Her header, upon posting this, was *so* cute!  And her kitten... You can't see right now, but I'm having small cuteness-overload attacks! ^___^).

Anyway, I had to meet a friend of mine in the afternoon as well as having the need to bake something.  He's been down lately so I wanted to give him something to enjoy while taking care of the hard stuff.  Call this my attempt at comfort food (although, because it has fruit, does it count?).

These muffins came out soft and the fruit stayed very nicely in the batter.  Plus, I got the opportunity to use my new hand-mixer (Christmas present!) just because I could.  Oh, the wonders of more modern baking technology!


Joy's Just-About-Anything Muffins

Hey there, I'm a crumble-topped muffin filled with fresh fruits of various shapes and colors.  Won't you please have a bite of me?  I'm even good with some coffee in the morning while you're doing Sudoku!


What You'll Need:
For the Muff:
  • 6 Tbsp unsalted butter* (This is about 1/3 cup plus a little bit.  If you want to be conversionally correct, 6 Tbsp is equal to 37/100 or 0.37 cups.  So, I eyeballed.)
  • 1/3 skim milk
  • 1 large egg
  • 1 egg yolk (Admittedly, isolating a yolk is tricky business.  Don't be afraid to break the yolk though!  I've found that the more fear you take into the task, the more broken yolks you end up with.  Besides all that, if you break the darn thing, just grab another egg.  Who's going to know that you broke the first one unless you tell 'em?  Right?)
  • 3/4 tsp vanilla extract (Artificial this time, my pure VE was at home...)
  • 1 1/2 cups all-purpose flour (I sifted it.  I know you don't have to, but I like the assurance of no packaged clumps.)
  • 3/4 cup white sugar
  • 1 1/2 tsp baking powder
  • 3/4 tsp salt*
  • 1 cup of fresh fruit  (My mum made a fruit platter for my aunt's Christmas Day dinner and we had some left-over berries that no one had touched.  It was strange, though, because they spontaneously disappeared from the fridge.  Well, with the exception of a handful of blueberries anyway!)
  • 3 Tbsp jam (I raided the cellar and found glass jars full of my mom's strawberry preserves.  Jarred strawberry, ftw!)

For the crumbly topping:
  • 3 Tbsp unsalted butter*
  • 1/2 cup all-purpose flour
  • 3 1/2 Tbsp sugar
*In making these, I skipped the salt.  Good reason lead to this because I could only get my eager hands on salted butter.  It happens sometimes.


How It's Done:
  1. Get a rack in the upper third of the oven.
  2. Preheat your oven to 375F.
  3. Muffin-cup up your pan for the dozen.  (Alternatively, you can also use those silicon liners or butter/flour the pan.  I think this is a more "your choice" deal.  Well, I really should say, "Your domain, your decisions"!  ^_^)
  4. Melt the butter in dish.  (I used the microwave at my mom's place, but I usually do this over simmering water because I like the control you get there.  Who's a control freak?  ME!  I have my flaws, 'nuff said.)
  5. Whisk together all the dry junk (flour, sugar, baking powder, and salt).
  6. To the melted butter, add in the milk, whole egg, egg yolk, and vanilla.  (I would suggest that your milk is near room temperature, otherwise, I think that the butter will probably get all solid and kind of curded.  This happened to me and they still turned out okay, but I might try room temperature milk next time.)
  7. Add the flour mixture (dry) to the wet ingredients until just combined.
  8. Fold in your fruit and jam.
  9. Make the topping by combining all the topping ingredients and crumble together with your hands.  (Pretty much my favorite step of the whole recipe.  It's like being in preschool all over again.)
  10. Bake in the oven until golden and the muffin of your choice (or many of your choices) pass the toothpick test.  This is approximately 18-24 minutes.  (For childhood-faithful, i.e. mum's oven, these babies took 24 minutes, but it might vary.  Oo, especially if you have one of those swanky ovens where you digitally set the temperature.  I, on the other hand, only have a dial divisioned by 50 degrees).
  11. When they're done, yank 'em out of the oven and then let them cool in the pan.  When you're feeling good about the temperature, pull them out onto a wire rack to cool completely.

Makes 12 tasty muffins.


These muffins were possible  because of Joy The Baker's recipe for Raspberry and Jam Muffins.  Aside from the butter connundrum (my bad!), the recipe featured there turned out to be wicked!

Bonne Année!

Happy January 1st, the first day of the Gregorian calendar year!  

Here's to leaving everything that happened in 2010 behind and heading head first into a new adventure!  From me to you, let me just wish you a fantastic year ahead filled with great things, good times with good friends and health and prosperity for you and your families.

Don't forget, of course, to take the lessons that you learned with you!  For me, this will likely be not to bake (no matter how much I feel like it) too far into the evening (otherwise, I will be dragging at work the next day). Also, I learned that nothing slows down your baking like only having one cookie sheet (seriously, it sucks pretty hard). Of course, there are tons of others but, in the interest of keeping this short, I'm going to move on to one last thing.

Resolutions.

Do people still make very serious resolutions for their new year of life?  It seems like its something more appropriately done one's birthday.  That way the resolution truly is for a brand new year.  But, hey, that's just me being weird I guess!

I may not have revealed this before, but I am truly a cookbook fiend.  What section do I stumble over to in the bookstore?  Well, fiction first, then magazines but, inevitably, I end up amidst the cookbooks.  I own a few too.  I have not, however, cooked anything (to my recollection) from a cookbook.  I have always cooked/baked from the internet.  My resolution this year is to (hopefully) suck it up and cook from a cookbook no matter how many flippin' ingredients are involved in the recipe.  

The only magic involved will be to use ingredients that I can reuse in other places....

Peace, love and prosperity!!!

Monday, December 27, 2010

Cookies Baking In A Closed Oven

I don't know about everyone, but for a lot of people Christmas is inherently linked to baking.  Maybe it’s the fruit cake.  Wait, is the cake they sell at the store even count as baking?  I mean, I know it’s baked, but it’s more like a paste by the time you unwrap it and everything.  I have respect for the dish as an acquired taste that some really dig.  I, on the other hand, am not interested in acquiring this taste.

But I digress.  I have been doing me some baking and figured that I would share.  I usually try new things during Christmas.  Sure, I bake the favorites (we shared Chocolate Chip cookies and I'm certain we discussed the snickerdoodles) but I like to try other stuff too.  Pivotal to this is the internet; a mighty tool of information-sharing and (on more than an occasional basis) a source of information.

So, with my meager baking utensils in hand and a tiny kitchen, I set off to bake up a minor storm to fulfill some vague suggestions that they might be received as gifts.  As part of this effort, I present to you some cookie brittle and coconut-lime biscotti.  If you've scrolled through already, you will probably have noticed that I only attached one recipe; I attached the recipe for the brittle.  Why no biscotti recipe? 

Its not a family secret or anything, I can assure you of that much.  I didn't include the recipe because I believe I used a little too much coconut and not enough lime.  The result?  The coconut totally took over the cookie and the only point where I started to detect the lime was during the second baking; I could smell the lime, however, still no taste.  Because of this, I'm not going to share quite yet.  This requires a re-bake with some adjustment.  When I get it all Goldilocks'd, I'll post it up, okay?


Almond Cranberry Crispy Brittle

The infamous biscotti, so harmless in loaf-form but so dreaded for double baking (left).  Before you get all hesitant and such, you should know that the double-bake is well worth the effort you put into it.  Mmm... Double baked crunchiness!  However, if you don't like baking twice for crunch, consider the cookie brittle instead (right).  You bake once, pressed out really thin and, boom, you have crunchy, yummy treats!

What You'll Need:
  • 1 cup "I Can't Believe Its Not Butter" margarine
  • 2 tsp pure vanilla extract
  • 1 cup sugar
  • 1/2 tsp kosher salt
  • 2 cups all-purpose flour, sifted
  • 1 cup toasted almond chunks (see below)
  • 3/4 cup dried cranberries
  • white chocolate chips for decorative purposes

How It's Done:
  1. Preheat your oven to about 350F. (The rack should be around the middle position of your oven for proper cooking.)
  2. Toast the almond bits.  (In a dry, non-greased fry pan over medium heat, toast the almond pieces until they turn from the light off-white color that they are in the package/bin.)
  3. Soften the margarine however you like and set aside for a short while.  (I just let it hang out in a dish and leave the dish on my oven while that ramps up as well.  Two birds, one stone.  All right.)
  4. While butter cools, sift together the salt and the flour and set aside.  (I also chose to measure out everything else at this point too because I'm picky like that.  Thumbs up for streamlining!)
  5. Transfer the butter to your mixing bowl and add the sugar and cream for a short span.
  6. Add in the vanilla extract and mix until dispersed out.
  7. Add the flour and mix to combine.  (My dough was a lot like really thick cookie dough at this point.  It was probably the margarine because I find that baking with margarine makes things a little bit stickier than butter.)
  8. Add in the toasted nuts first, making sure they're combined.
  9. Add in the cranberries, turning the mixture over until the berries are also pretty much throughout.
  10. Using a spatula, put half of the dough onto a tin-foiled baking sheet and then squish down until really thin and more-or-less even.
  11. Bake for 24 minutes in the oven; let the other half of the dough chill out in the fridge while you're baking it up.  (And then you can either set a timer and check back OR you can be like me and sit there watching it.  However, it should be noted that I only watched the first batch.  I was worried this was going to be an epic fail and then I'd be scraping it off of everything.  I realized after the fact that I had used tin foil.  Silly me.)
  12. Remove when the edges are dark brown and the middle is a lighter brown and let it cool down on the pan for a bit then transfer to a rack.  (I tried to lift the first batch out of the pan with very little success because it started to sag in the middle.  By letting it hang out on the pan for a bit and then moving it away, it was pretty firm and the transfer was super easy.)
  13. Bake up the second batch the same way.  (Same story, other half of the dough.)
  14. Let the almondy-cran-awesomeness cool entirely then break it into bits and hook it up with a home in an airtight container.  (I spread melted white chocolate chips and then spread it over one half.  If you do this, the brittle should then chill in the fridge for an hour or so to get everything all solid.)

This recipe was adapted based on the recipe for Chocolate Chip Cookie Brittle that I found on Shauna's site called 'Piece of Cake' (click here!).  It was a total 'stumbled upon' moment, whilst I was wandering aimlessly around on the internet.  The recipe totally worked out well (even given the fact that I didn't use chocolate chips and used almonds/cranberries instead).  I'd really like to try this with another flavor combination.  Not sure what yet.  I'm thinking something like... well, there's... oatmeal raisin?  Maybe that's a little plain Jane.  I'll keep thinking on it.  We'll talk again in the future!